KeeperFill Deployment for Chrome with Intune
Intune Deployment - KeeperFill for Chrome
Source:
Group Policy Deployment - Edge - Enterprise Guide (keeper.io)
Deploy Microsoft Edge policy using ADMX template in Microsoft Intune | Microsoft Learn
Step 1: Download the Chrome ADMX templates and prerequisites
Download the Chrome ADM/ADMX templates from the URL below. Click on Accept and download.
https://chromeenterprise.google/browser/download/#manage-policies-tab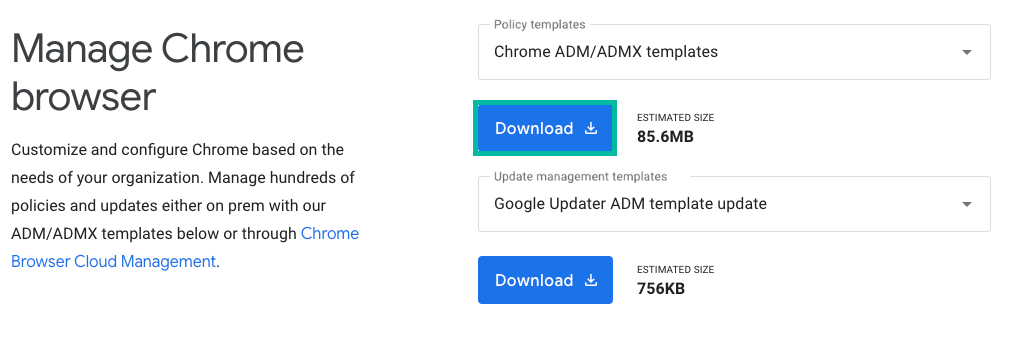
Extract the Google Chrome policy_templates.zip to your desired location. Ex: C:\temp
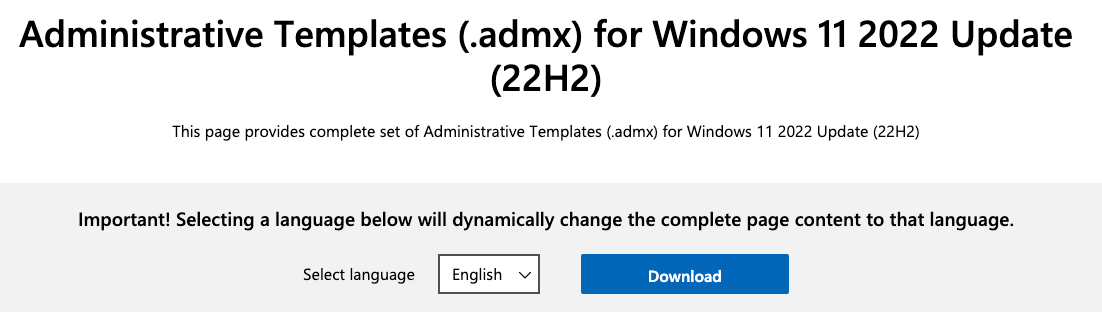
Download the Administrative templates (.admx) for Windows 11/10 from the URL below.
https://www.microsoft.com/en-US/download/details.aspx?id=104593
Install the Administrative Templates.
Step 2: Add ADMX templates to Intune
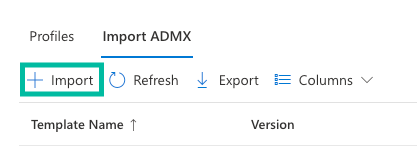
- Sign in to the Microsoft Intune admin center.
- Select Devices > Configuration profiles > Import ADMX > Import.
Note: You must upload the admx and adml files in this order. If not, the error message “ADMX file referenced not found NamespaceMissing:Microsoft.Policies.Windows. Please upload it first.” or “ADMX file referenced not found NamespaceMissing:Google.Policies. Please upload it first.” is displayed. - Import the windows.admx and windows.adml files:
- Click Import.
- ADMX file: C:\Windows\PolicyDefinitions\windows.admx
- ADML file: C:\Windows\PolicyDefinitions\en-US\windows.adml (select your language)
- Click Next.
- Click Create.
- Import the google.admx and google.adml files:
- Click Import.
- ADMX file: \policy_templates\windows\admx\google.admx
- ADML file: \policy_templates\windows\admx\en-US\google.adml (select your language)
- Click Next.
- Click Create.
- Import chrome.admx and chrome.adml files:
- Click Import.
- ADMX file: \policy_templates\windows\admx\chrome.admx
- ADML file: \policy_templates\windows\admx\en-US\chrome.adml (select your language)
- Click Next.
- Click Create.
Step 3: Configure Chrome policy
- Select Devices > Windows > Configuration profiles
- Click Create Profile.
- Enter the following properties:
- Platform: Select Windows 10 and later.
- Profile: Select Templates > Imported Administrative templates.
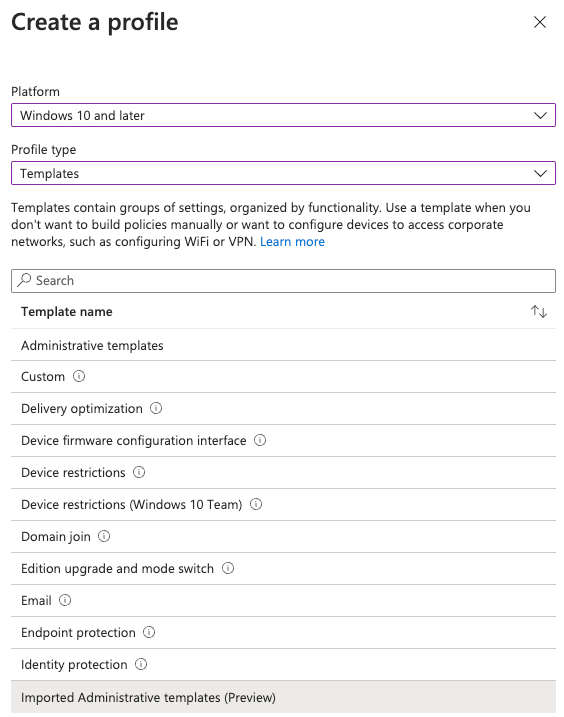
- Select Create.
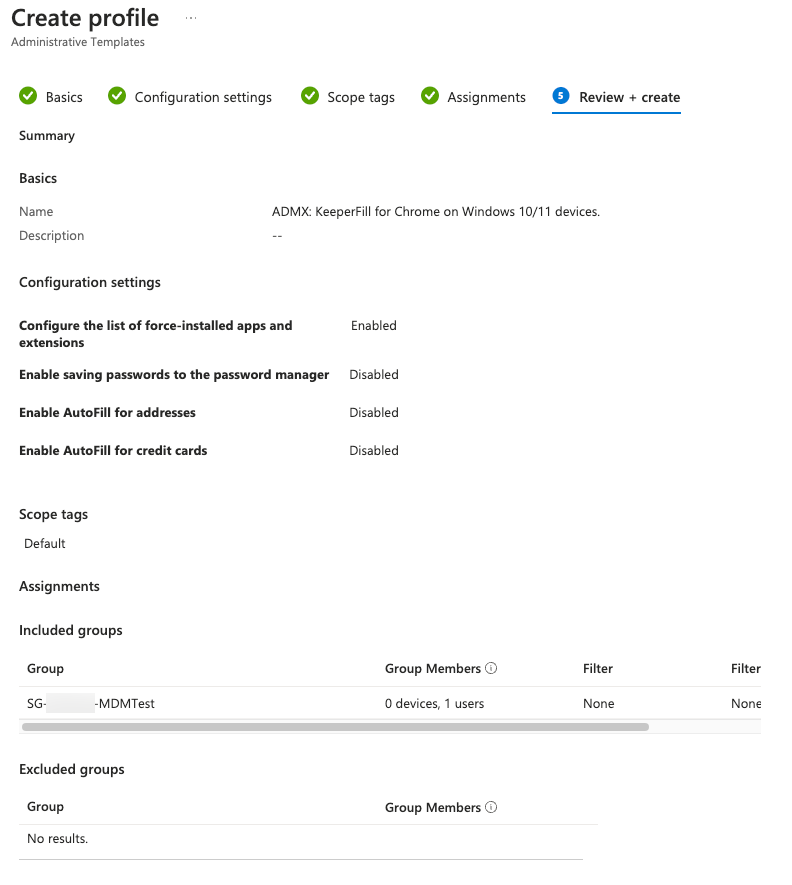
- In Basics, enter the following properties:
- Name: Enter a descriptive name for the profile. Name your profiles so you can easily identify them later. For example, a good profile name is ADMX: KeeperFill for Chrome on Windows 10/11 devices.
- Description: Enter a description for the profile. This setting is optional, but recommended.
- Select Next.
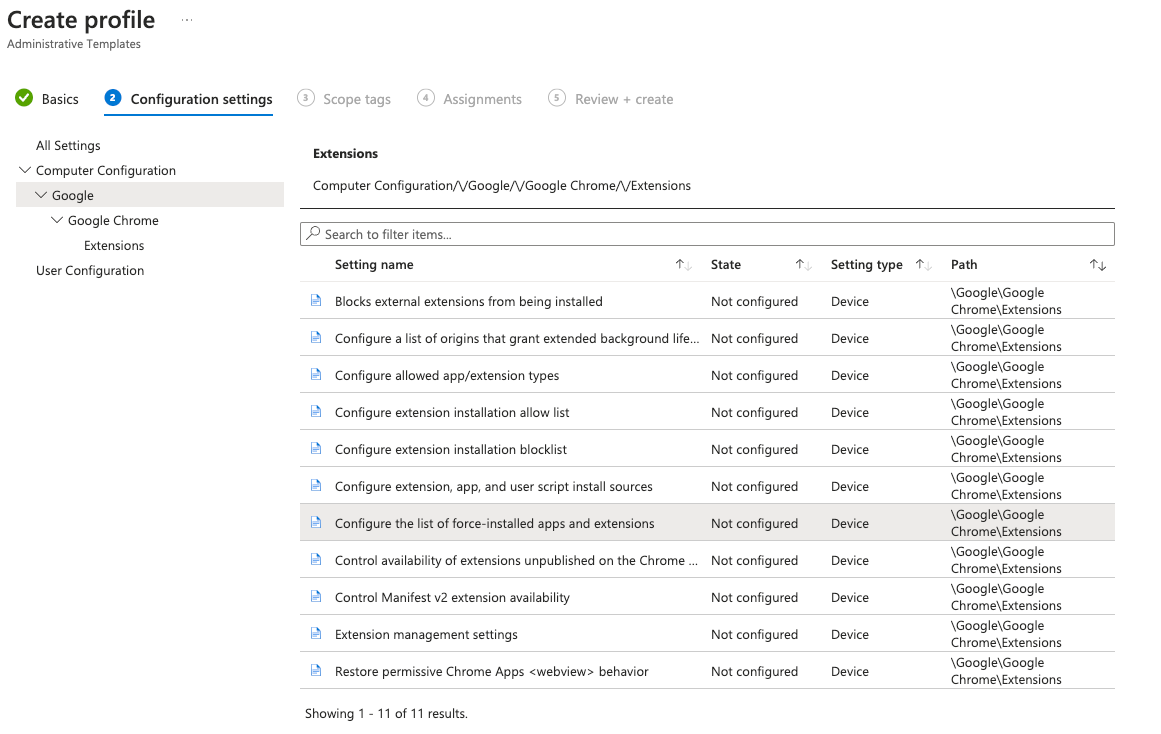
- In Configuration settings, the Google > Google Chrome settings are available in Computer configuration and User configuration.
- Computer configuration: Settings apply to the computer, even if no one is signed in.
- User configuration: Settings apply to all users signed in to the device.
- Select Computer Configuration > Google > Google Chrome > Extensions > Configure the list of force-installed apps and extensions.
- Enable the settings and add the following text and click OK
bfogiafebfohielmmehodmfbbebbbpei;https://clients2.google.com/service/update2/crx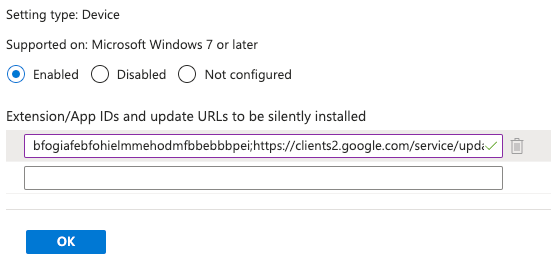
- (Optional) to force-pin the KeeperFill extension select Computer Configuration > Google > Google Chrome > Extension > Extension management settings.
- Enable the setting and add the following text then click OK
{
  "bfogiafebfohielmmehodmfbbebbbpei":
  {
    "toolbar_pin": "force_pinned"
  }
}
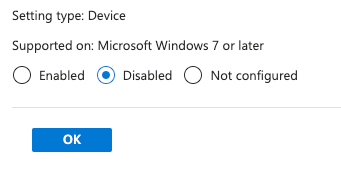
- Select Computer Configuration > Google > Google Chrome > Password manager > Enable saving password to the password manager.

- Disable and click OK
- Select Computer Configuration > Google > Google Chrome and search for Enable AutoFill
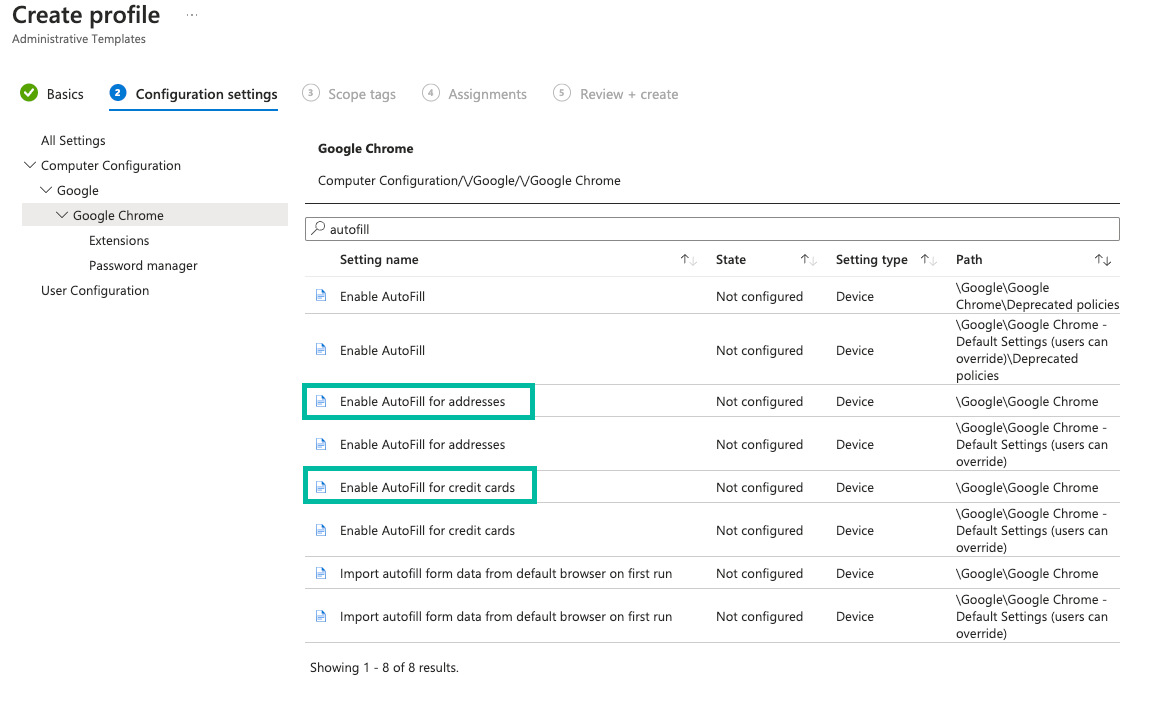
- Decide if the user can override or not and set the appropriate policies to Disabled and click OK

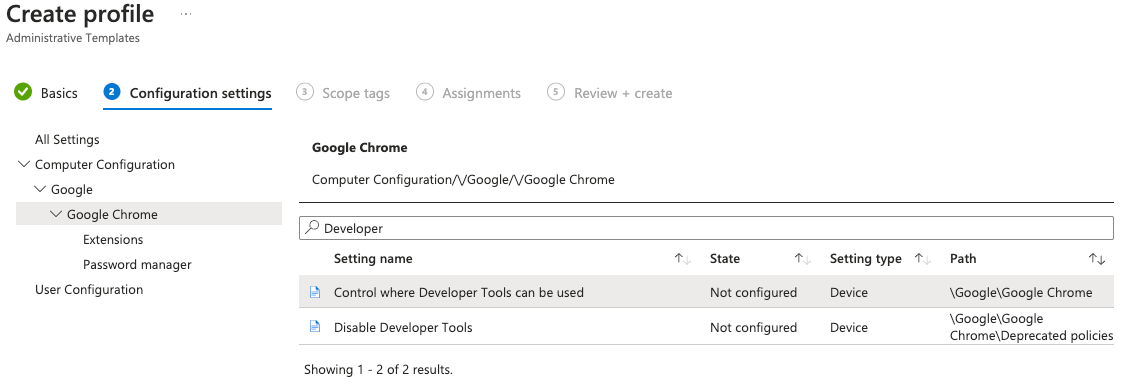
- (Optional) If you would like to disable Developer Tools, to further secure against users attempting to unmask a masked password / credential, still within Computer Configuration > Google > Google Chrome search for Developer
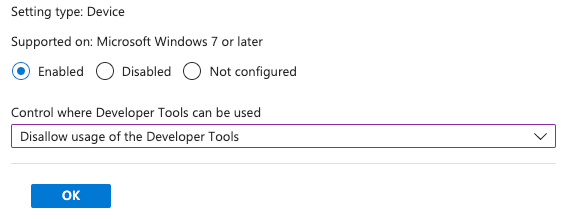
- Set to Enabled and select the Options value of Don’t allow using the developer tools or Disallow usage of the Developer Tools on apps and extensions installed by enterprise policy.[…] Allow use of Developer Tools in all other contexts. and click OK.
- Select Next.
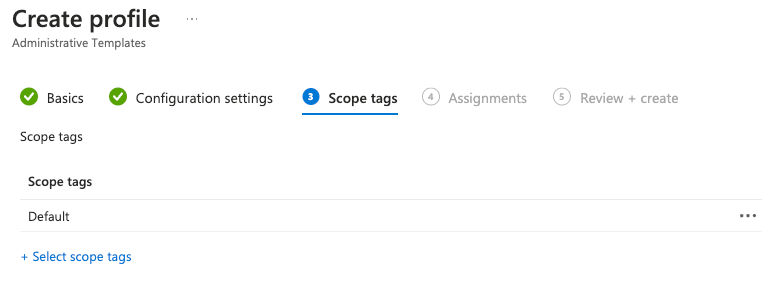
- In Scope tags, select Next.
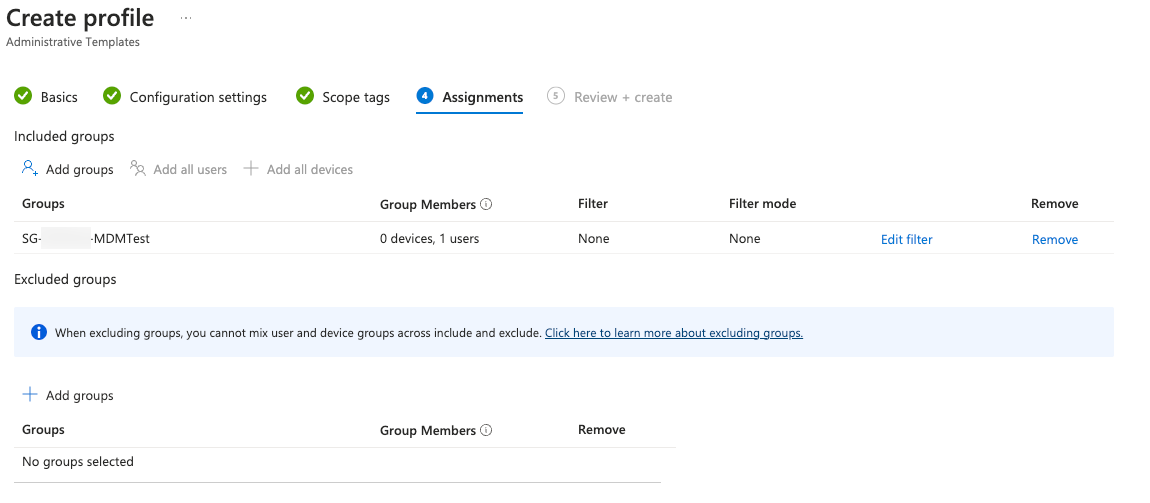
- In Assignments, assign to groups and select Next.
- In Review + create, see the summary of your changes. Select Create.